Watermarking
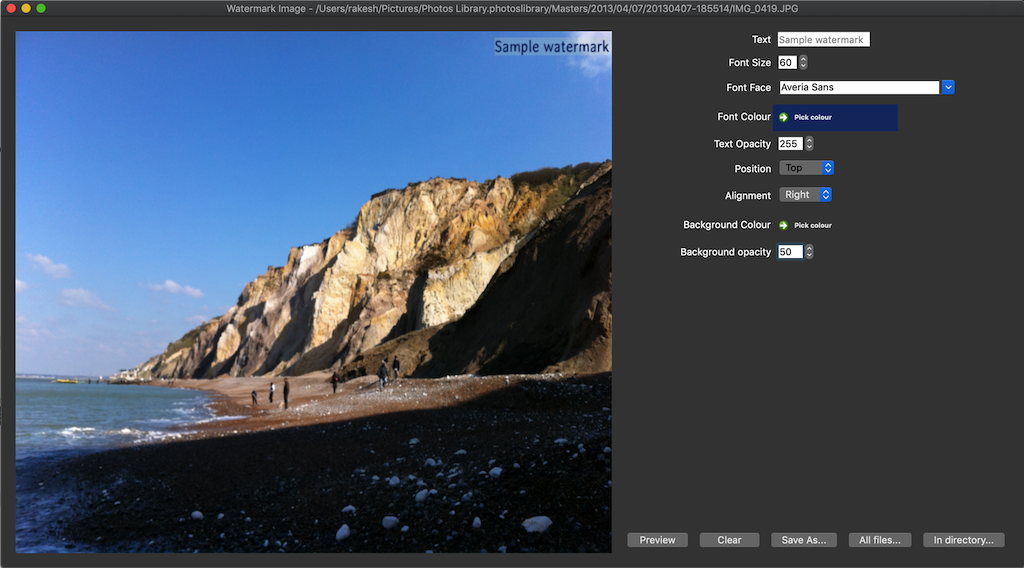
Very simple interface for rendering some very basic watermark text over an image. Use the position and alignment drop-downs to specify the location of the watermark text. Use the font and background colour and opacity properties to control how the text is displayed. The font size is automatically corrected while rendering the watermark to make the text fit within the width of the image.
Single file
While viewing images using the player window, use the Tools->Watermark menu to display the watermarking controls window. Set up the font and background as desired, and use the Preview button to see how the text is displayed. Use the Save as... button to select the destination folder/file where the watermarked image is to be saved.
Warning: If you specify an existing file, it will be over-written by the new watermarked image. A warning dialogue window will be displayed asking for your confirmation before over-writing the file.
Multiple files
Set up the text as above, and use the In directory... or All files… buttons to apply the watermark to a batch of files.
- All files… - Apply the watermark to all files loaded in the player window. This can span multiple directory trees recursively just as the player does.
- In directory… - Apply the watermark only to sibling files in the same parent directory as the image displayed in the watermark window. This does not recursively process files that may exist in sub-directories of the parent directory.
Use the file dialogue displayed to select the destination folder where the watermarked images are to be saved. If files exist in the destination directory with the same names as the source files, the new output files will generate unique names using the common
filename (1..n).ext strategy.
