Lab 5: Text Input
In this exercise we will look at how we can handle custom text types and apply rules to user input via text input components.
Displaying formatted text
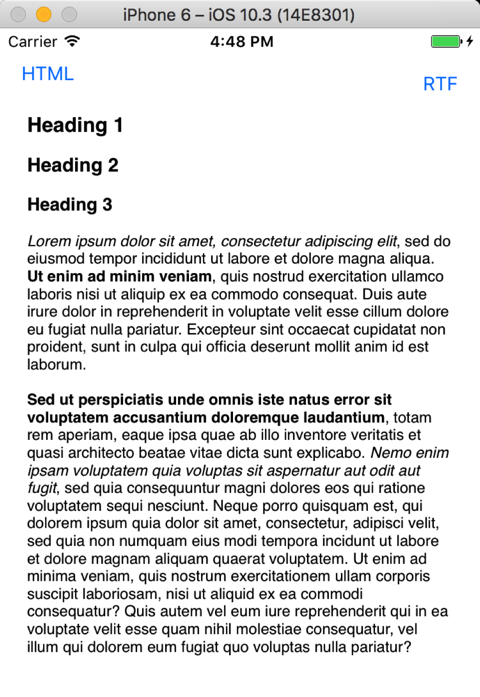
Create a project named lab5 and create an interface with two buttons - HTML and RTF, and a UITextView that fills the rest of the screen.

We will use two resources files that we will load and display in the text view when the appropriate buttons are clicked. Add a
Modify the ViewController and add the action handler functions which will load the resource files and represent them using a NSAttributedString class.
Xcode 7

We will use two resources files that we will load and display in the text view when the appropriate buttons are clicked. Add a
lorem.html and lorem.rtf file to the project. They may contain any text, just needs to be HTML and RTF documents.Modify the ViewController and add the action handler functions which will load the resource files and represent them using a NSAttributedString class.
Xcode 7
  @IBOutlet weak var textView: UITextView!

  @IBAction func displayHtml() {
    if let url = NSBundle.mainBundle().URLForResource("lorem", withExtension: "html") {
      do {
        let data = NSData(contentsOfURL: url)
        let attrStr = try NSAttributedString(data: data, options: [NSDocumentTypeDocumentAttribute:NSHTMLTextDocumentType], documentAttributes: nil)
        textView.attributedText = attrStr
      }
      catch {
        NSLog("error creating attributed string from HTML”)
      }
    }
  }

  @IBAction func displayRtf() {
    if let url = NSBundle.mainBundle().URLForResource("lorem", withExtension: "rtf") {
      do {
        let data = NSData(contentsOfURL: url)
        let attrStr = try NSAttributedString(data: data, options: [NSDocumentTypeDocumentAttribute:NSRTFTextDocumentType], documentAttributes: nil)
        textView.attributedText = attrStr
      }
      catch {
        NSLog("error creating attributed string from RTF“)
      }
    }
  }
Xcode 8+
  @IBOutlet weak var textView: UITextView!

  @IBAction func displayHtml() {
    if let url = Bundle.main.url(forResource: "lorem", withExtension: "html") {
      do {
        let data = try Data(contentsOf: url)
        let attrStr = try NSAttributedString(data: data, options: [NSDocumentTypeDocumentAttribute:NSHTMLTextDocumentType], documentAttributes: nil)
        textView.attributedText = attrStr
      }
      catch {
        NSLog("error creating attributed string")
      }
    }
  }

  @IBAction func displayRtf() {
    if let url = Bundle.main.url(forResource: "lorem", withExtension: "rtf") {
      do {
        let data = try Data(contentsOf: url)
        let attrStr = try NSAttributedString(data: data, options: [NSDocumentTypeDocumentAttribute:NSRTFTextDocumentType], documentAttributes: nil)
        textView.attributedText = attrStr
      }
      catch {
        NSLog("error creating attributed string")
      }
    }
  }
Formatting Selected Text
We will now use the
To make things easier, we will add an extension to UITextView that will return a range of the selected text within the text displayed in the view.
Xcode 7
textStorage property for a UITextView to change the formatting attributes of the user selected text in the view.To make things easier, we will add an extension to UITextView that will return a range of the selected text within the text displayed in the view.
Xcode 7
extension UITextView {
    func selectedTextIndexes() -> (startIndex:String.Index, endIndex:String.Index)? {
        if let range = self.selectedTextRange {
            if !range.empty {
                let location = self.offsetFromPosition(self.beginningOfDocument, toPosition: range.start)
                let length = self.offsetFromPosition(range.start, toPosition: range.end)

                let startIndex = self.text!.startIndex.advancedBy(location)
                let endIndex = self.text!.startIndex.advancedBy(length)

                return (startIndex, endIndex)
            }
        }
        return nil
    }
}
Xcode 8+
extension UITextView {
  func selectedTextIndexes() -> (startIndex:String.Index, endIndex:String.Index)? {
    if let range = self.selectedTextRange {
      if !range.isEmpty {
        let location = self.offset(from: self.beginningOfDocument, to: range.start)
        let length = self.offset(from: range.start, to: range.end)

        let startIndex = self.text!.index(self.text!.startIndex, offsetBy: location)
        let endIndex = self.text!.index(startIndex, offsetBy: length)

        return (startIndex, endIndex)
      }
    }
    return nil
  }
}
Implement the
Xcode 7
UITextViewDelegate.textViewDidChangeSelection(textView:) delegate function to intercept text selection events.Xcode 7
    func textViewDidChangeSelection(textView: UITextView) {
        if let _ = textView.selectedTextIndexes() {
            textView.textStorage.addAttributes([NSFontAttributeName: UIFont.preferredFontForTextStyle(UIFontTextStyleHeadline)], range: textView.selectedRange)
        }
    }
Xcode 8+
  func textViewDidChangeSelection(_ textView: UITextView) {
    if let selectedTextIndexes = textView.selectedTextIndexes() {
      let startIndex = selectedTextIndexes.startIndex
      let endIndex = selectedTextIndexes.endIndex
      if (textView.text?.substring(with: startIndex..<endIndex)) != nil {
        textView.textStorage.addAttributes([NSFontAttributeName:UIFont.preferredFont(forTextStyle: UIFontTextStyle.headline)], range: textView.selectedRange)
      }
    }
  }
